Mastering Polaroid Photo Frame Love: A Guide to Flawless Sublimation and Design
The aesthetic of instant photography has transcended its analog roots to become a cornerstone of modern digital design. Polaroid Photo Frame Love represents more than just a nostalgic visual trend; it is a versatile tool for creators who want to add warmth, authenticity, and structure to their projects. Whether you are designing social media banners, crafting personalized gifts, or organizing digital scrapbooks, the right frame can elevate a simple image into a compelling story. However, the ease of accessing digital assets often leads to overlooked technical details that can compromise the final output.
Many beginners and even seasoned designers stumble when integrating these elements into their workflows. The difference between a amateur-looking composite and a professional-grade design often lies in the preparation and understanding of the file formats. By addressing common pitfalls early, you can ensure that your creative efforts yield high-quality, usable results every time.
The Trap of Low-Resolution Assets
One of the most frequent mistakes creators make is ignoring the resolution specifications of their digital downloads. It is tempting to grab any free graphic from the internet, but using a low-resolution image for print or large-format digital display is a recipe for disappointment. When you zoom in on a pixelated edge, the illusion of a physical photo frame breaks instantly, ruining the credibility of your design.
Polaroid Photo Frame PNG Designs must be sourced in high resolution, ideally at 300 DPI (dots per inch). This standard ensures that when you scale the frame for a sublimation print on a mug, a t-shirt, or a large poster, the edges remain crisp and clean. A 72 DPI image might look acceptable on a small smartphone screen, but it will appear blurry and unprofessional when printed. Always verify the DPI before starting your project. If the source does not specify 300 DPI, assume it is unsuitable for high-quality printing.
Ignoring Transparent Backgrounds
Another critical oversight involves the background format. Many users download JPEG files instead of PNGs, not realizing that JPEGs do not support transparency. A JPEG frame comes with a white (or colored) box around it. When you place this over your own photo, you block out parts of your image with an opaque square, forcing you to spend extra time erasing the background manually. This process is inefficient and often results in jagged, uneven edges.
By choosing Polaroid Photo frame PNG Designs with transparent backgrounds, you streamline your workflow significantly. Transparency allows the frame to sit naturally over your content, letting your photos show through the center while the frame borders define the composition. This is particularly important for sublimation designs, where the ink needs to bond seamlessly with the substrate without unwanted white blocks interfering with the visual flow. Always check that the file extension is .png and that the checkerboard pattern (indicating transparency) is visible in your editing software.
Misunderstanding Sublimation Requirements
Sublimation printing is a popular method for creating custom merchandise, but it has specific requirements that differ from standard paper printing. A common error is failing to mirror the design before printing. Since sublimation transfers the image from paper to fabric or ceramic via heat and pressure, the final result will be reversed if you do not flip your canvas horizontally. This mistake is especially costly when text is involved, such as adding a date or a name within the Polaroid Photo Frame Love layout.
Additionally, color management is crucial. Screens emit light, while sublimation ink absorbs into materials. Colors often appear darker or more muted on the final product. To avoid dissatisfaction, it is wise to perform a test print on a small scrap piece of material. Adjust your brightness and contrast settings accordingly. Using high-quality, 300 DPI PNG files ensures that the color gradients in the frame’s shadow and highlight details transfer accurately, preserving the depth and realism of the polaroid effect.
Overlooking Composition and Balance
Having the right file is only half the battle; how you use it matters just as much. A frequent design error is overcrowding the frame. The charm of a polaroid style lies in its simplicity and the generous white space typically found at the bottom. Some creators try to fill every inch of the frame with text or additional graphics, which clutters the design and distracts from the main photograph.
Instead, embrace the negative space. Use the bottom area of the Polaroid Photo Frame Love template for minimal text, such as a date, a short caption, or a signature. Let the photo breathe within the borders. If you are creating a collage, ensure that the frames are aligned consistently. Misaligned frames can make a layout look chaotic rather than curated. Use grid lines or alignment tools in your design software to maintain uniform spacing and orientation.
Neglecting Licensing and Usage Rights
For entrepreneurs and small business owners, understanding licensing is non-negotiable. Downloading a "free" graphic does not automatically grant you the right to sell products featuring that design. Many creators inadvertently violate copyright terms by using personal-use assets for commercial projects. This can lead to legal issues and the removal of listings from marketplaces.
Always read the license agreement associated with your Printable designs. Look for terms like "Commercial Use Allowed" or "POD (Print on Demand) Friendly." Reputable providers will clearly state what you can and cannot do with their files. Investing in properly licensed assets protects your business and supports the designers who create these resources. It is a small step that ensures long-term sustainability for your creative enterprise.
Practical Steps for Success
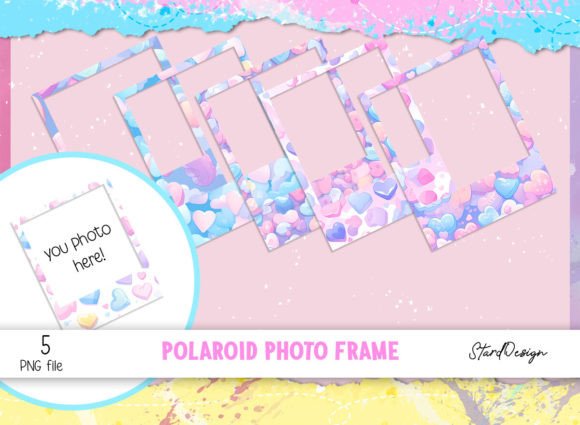
To maximize the value of your 6 PNG files, follow these best practices:
- Organize Your Files: Store your high-resolution PNGs in a dedicated folder. Label them clearly so you can quickly find the right frame style for your project.
- Check Dimensions: Ensure the pixel dimensions of the frame match or exceed the size of your intended output. Scaling up a small image degrades quality; scaling down is generally safe.
- Layer Correctly: In your design software, place the photo layer beneath the frame layer. Use clipping masks if necessary to keep the photo strictly within the frame’s boundaries.
- Test Print: Always do a test run on your specific material. Different substrates absorb ink differently, affecting the final appearance of the frame’s shadows and textures.
- Add Personal Touches: While the frame provides structure, your unique content brings it to life. Experiment with different fonts and color palettes that complement the vintage aesthetic of the polaroid style.
By avoiding these common mistakes and adhering to technical best practices, you can leverage Polaroid Photo Frame Love to create stunning, professional-quality designs. Whether for Scrapbooking, marketing materials, or personalized gifts, attention to detail ensures that your final product resonates with your audience and stands the test of time.