Unlocking Spring Creativity with the Easter Gnomes Bundle Decorative Template
There is a distinct joy in watching a flat sheet of material transform into a whimsical character that brings a room to life. The Easter Gnomes Bundle Decorative Template offers exactly this opportunity, providing digital multilayer layout files specifically prepared for laser cutters, CNC routers, and other precision cutting machines. Whether you are a seasoned shop owner or a hobbyist looking to add a touch of Easter spirit to your home, these designs serve as a fantastic starting point. However, diving into layered vector projects requires more than just hitting "cut." To ensure your finished product looks professional rather than precarious, it is essential to understand the nuances of material selection, scaling, and assembly before you begin.
Understanding the Design and Its Potential
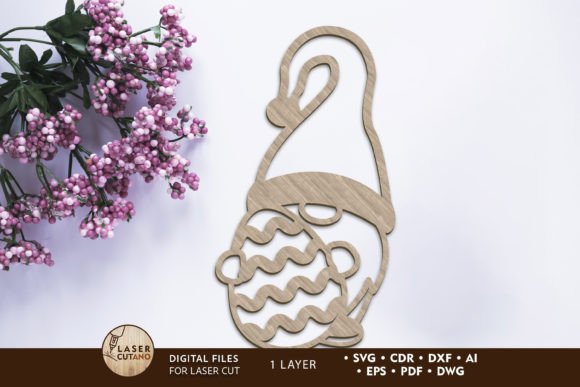
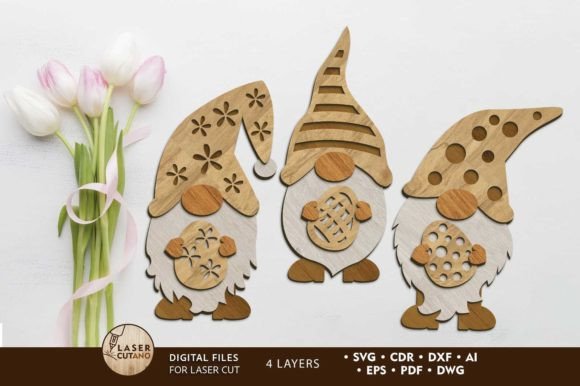
The core appeal of the Easter Gnome design lies in its charm and simplicity. These files are engineered to create a 3D effect through stacking, typically resulting in a finished product measuring approximately 6 x 10 inches. With four distinct layers, the design relies on depth to define the gnome's hat, beard, and body. While the description often highlights compatibility with popular machines like the Cricut for paper or cardstock versions, the true potential of these multilayer layout files shines when used with rigid materials like plywood, MDF, acrylic, or even metal.
Many creators are drawn to these bundles because they offer a quick path to seasonal decor. For entrepreneurs, this means having inventory ready for spring markets without spending days designing from scratch. For educators and parents, it provides a structured project that teaches spatial reasoning and craftsmanship. Yet, the ease of downloading a file can sometimes lead to overlooking critical preparation steps that determine the quality of the final piece.
Common Pitfalls in Material Selection and Thickness
One of the most frequent mistakes beginners make is ignoring the recommended material thickness. The template suggests a wood thickness between 3 mm and 6 mm (roughly 1/8 inch to 1/4 inch). Deviating from this range without adjusting the file can lead to significant structural issues. If you choose material that is too thin, the layers may not stack high enough to create the intended 3D profile, making the gnome look flat and underwhelming. Conversely, using material that is too thick can cause alignment problems; the glue joints may become visible gaps, or the layers might not sit flush, ruining the smooth silhouette of the design.
Furthermore, not all materials behave the same way under a laser or router bit. While the file supports plywood, MDF, and acrylic, each requires different settings. A common oversight is failing to account for the kerf—the width of material removed by the cutting tool. When layers are designed to fit together tightly or align perfectly, a wide kerf on thick plywood can result in loose fittings. Always test your settings on a scrap piece of the exact same material batch you intend to use for the final product.
The Critical Error of Scaling Without Verification
The flexibility to increase the size of the design is a wonderful feature, allowing you to create large yard decorations or substantial indoor centerpieces. However, the warning regarding reducing the design cannot be overstated. These multilayer models contain fine details, such as the trim on the hat or the contours of the beard. When you scale the entire vector down significantly, these elements can become thinner than your cutting tool can accurately reproduce.
If you shrink the design too much, you risk losing these delicate features entirely. The laser might burn through a thin line meant to be solid, or a CNC bit might break trying to navigate a path that is too narrow. A better approach is to maintain the original proportions whenever possible. If a smaller size is absolutely necessary, consider simplifying the design by removing the smallest inner layers or merging them, ensuring the remaining lines are robust enough to survive the cutting process.
Assembly and Finishing: Order Matters
Perhaps the most impactful advice for achieving a professional finish concerns the order of operations during assembly. A tempting shortcut is to cut the layers, stack them immediately, and then paint the entire assembled gnome. This often leads to poor results. Paint can seep into the glue joints, creating messy ridges, or fail to cover the edges where layers meet, leaving raw material exposed.
The superior method is to paint before gluing. Take the time to sand each individual layer lightly if working with wood, apply your base coats and details while the pieces are flat, and let them dry completely. Once painted, assemble the layers using a strong adhesive suitable for your chosen material. This technique ensures crisp lines, even coverage, and a seamless look where the layers join. It adds a step to your workflow but drastically elevates the perceived value of the finished item.
Choosing the Right Application for Your Goals
Before committing to a production run, evaluate how the Easter Gnomes Bundle Decorative Template fits your specific needs. If you are creating gifts for friends, a single run on high-quality birch plywood with a natural stain might be perfect. If you are a marketer creating promotional items, acrylic layers in pastel colors could offer a modern, durable alternative that stands out on a desk.
It is also wise to check the file format compatibility with your specific machine software. While these files are generally universal, ensuring your vector program interprets the layers correctly prevents wasted material. Look for closed paths and verify that no stray lines exist that could confuse the cutter.
Ultimately, success with these digital layouts comes from respecting the design constraints while leveraging your creativity. By paying attention to material thickness, avoiding excessive reduction in size, and adhering to a paint-then-glue workflow, you can produce charming, whimsical gnomes that truly capture the Easter spirit. Whether for personal enjoyment or commercial sale, taking these corrective steps ensures your effort results in a high-quality decorative item that brings joy to any space.