Elevating Interior Spaces with a Custom Home Wall Panel and Decorative Template
The concept of "home" extends far beyond the physical structure of a building; it is an emotional sanctuary defined by the atmosphere we cultivate within its walls. In recent years, interior design trends have shifted away from mass-produced, generic decor toward personalized, handcrafted elements that tell a story. One of the most effective ways to achieve this bespoke aesthetic is through the use of a Home Wall Panel combined with a versatile Decorative Template. These digital assets serve as the blueprint for creating layered, three-dimensional art that transforms flat surfaces into focal points of warmth and joy.
Whether you are a professional maker running a small business or a hobbyist looking to add a personal touch to your living room, understanding the potential of these multilayer layout files is essential. This guide explores the practical applications, material considerations, and creative possibilities inherent in designing and producing custom wall signage.
The Mechanics of Multilayer Design
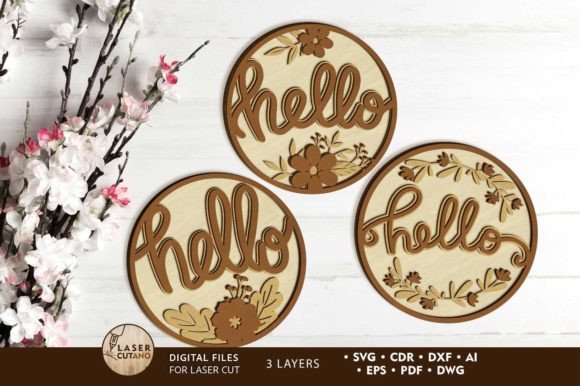
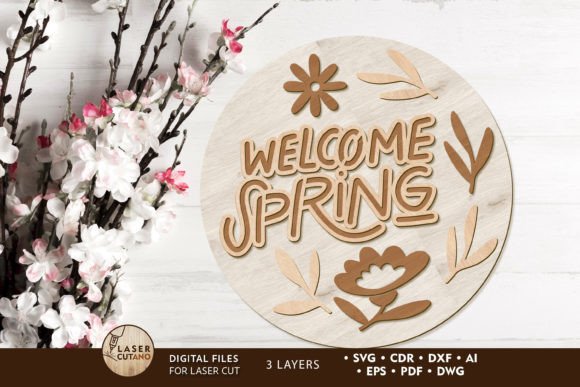
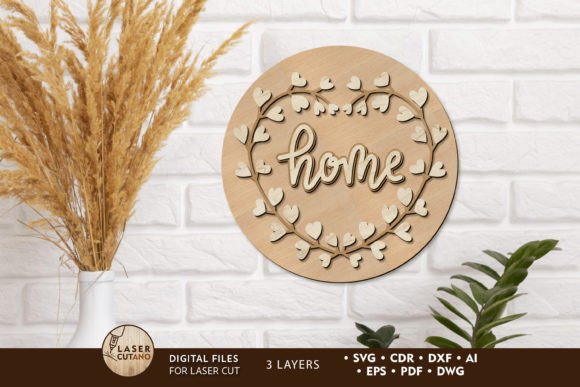
At the heart of this decorative approach is the multilayer layout. Unlike traditional single-cut signs, a multilayer design consists of several distinct planes stacked upon one another. For the specific template discussed here, the finished product typically measures 14 x 14 inches and comprises three distinct layers. This layering technique creates depth, shadow, and texture, giving the piece a sophisticated look that flat vinyl decals simply cannot match.
When utilizing files prepared for laser cutters or CNC routers, the precision of the cut is paramount. The digital files—available in formats such as .AI, .SVG, .DXF, .DWG, .CDR, .EPS, and .PDF—are vector-based. This ensures that the machine reads the paths accurately, resulting in clean edges and perfect alignment between layers. The process usually involves cutting each layer separately, painting them individually to ensure full coverage without seepage, and then gluing them together to form the final cohesive unit.
Material Selection and Thickness Considerations
The versatility of a Home Wall Panel lies in its adaptability to various materials. While the design intent may remain constant, the choice of substrate dramatically alters the final aesthetic and durability. Common recommendations include:
- Plywood and MDF: Ideal for a rustic or modern farmhouse look. These woods take paint beautifully and offer a sturdy base for wall mounting.
- Acrylic and Plexiglas: Perfect for contemporary spaces. Acrylic offers a sleek, glossy finish and can be backlit for a glowing effect.
- Metal: Provides an industrial chic vibe, though it requires specific laser settings and safety precautions during cutting.
- Cardboard and Paper: Excellent for prototyping designs or creating temporary event decor where cost and weight are primary concerns.
For wood-based projects, the recommended material thickness typically ranges from 3 mm to 6 mm (approximately 1/8 inch to 1/4 inch). Adhering to these thickness guidelines is crucial. If the material is too thin, the sign may lack structural integrity and appear flimsy. Conversely, if the material is too thick, the adhesive may struggle to bond the layers effectively, and the overall weight could make wall mounting difficult.
Practical Applications and Real-World Scenarios
The utility of a Decorative Template extends beyond simple wall hanging. Creators and business owners can leverage these files to solve various design challenges. Consider the following scenarios:
- The Welcoming Entryway: A home's entrance sets the tone for the entire visit. A multilayer sign featuring a warm greeting or a family name, crafted from stained plywood, immediately establishes a cozy and inviting vibe. The shadows cast by the layers add a dynamic element that changes throughout the day as natural light shifts.
- Nursery and Kids' Rooms: Soft pastel colors applied to MDF layers can create whimsical characters or inspirational quotes. Because the layers are glued, there are no loose small parts, making it a safer option for children's environments compared to hanging ornaments.
- Small Business Branding: Coffee shops, boutiques, and salons often seek unique signage that reflects their brand identity without the high cost of custom metal fabrication. Using a CNC router to cut a branded logo from acrylic layers allows for a professional, high-end look at a fraction of the price.
- Event Decor: For weddings or parties, these templates can be scaled up or down. A large-scale version made from lightweight foam board or cardboard can serve as a photo backdrop, while smaller versions can act as table centerpieces.
Scaling and Design Limitations
One of the significant advantages of vector-based laser cut sign wood files is scalability. Users can increase the size of the design to fit larger wall spaces or specific architectural needs. However, caution must be exercised when reducing the design size. As the overall dimensions shrink, the width of the connecting bridges and fine details also decreases. If a design is scaled down too aggressively, these thin elements may become fragile and break during the cutting process or handling. It is always advisable to test a small prototype, perhaps using paper or cardstock, before committing expensive materials like hardwood or acrylic to a reduced-scale project.
The Workflow: From Digital File to Finished Art
Creating a stunning Home Wall Panel is a journey that begins with the right digital assets. Upon acquiring the product, users receive a compressed .zip file. It is imperative to unzip this folder completely before attempting to open any individual files. Trying to access vectors directly from within the archive can lead to software errors or corrupted data.
Once the files are extracted, the creator selects the format compatible with their machinery. For instance, Glowforge users typically prefer .SVG files, while those operating industrial CNC routers might opt for .DXF or .DWG. The workflow generally follows these steps:
- Preparation: Import the file into the machine's software. Verify the dimensions match the intended output (e.g., 14x14 inches).
- Cutting: Execute the cut on the chosen material. Ensure the bed is level and the focus is set correctly to avoid burn marks or incomplete cuts.
- Finishing: Sand the edges lightly if working with wood. Apply paint or stain to each layer before assembly. Painting after gluing often results in uneven coverage in the crevices between layers.
- Assembly: Use a strong wood glue or acrylic cement to bond the layers. Clamping may be necessary while the adhesive cures to ensure a tight fit.
- Mounting: Attach hanging hardware to the back of the top layer or use a French cleat system for heavier pieces.
Evaluating Suitability for Your Project
Before diving into production, it is wise to evaluate whether this specific template aligns with your goals. If you are looking for a quick, single-color decal, a multilayer approach may be overkill. However, if your goal is to create a piece with depth, shadow play, and a handcrafted feel, this method is unparalleled. Furthermore, consider the environment where the piece will hang. Humidity and direct sunlight can affect certain materials; for example, untreated MDF may warp in high humidity, whereas acrylic remains stable.
In conclusion, the fusion of a well-designed Decorative Template with modern cutting technology empowers individuals to turn their homes into galleries of personal expression. By understanding the nuances of material thickness, layering techniques, and file management, creators can produce high-quality Home Wall Panels that not only fill empty space but also infuse the room with character, warmth, and enduring joy. Whether for personal enjoyment or commercial resale, these tools provide a robust foundation for creativity in the modern maker economy.