Mastering Your Class 2024 Decorative Laser Cut File for Flawless Graduation Projects
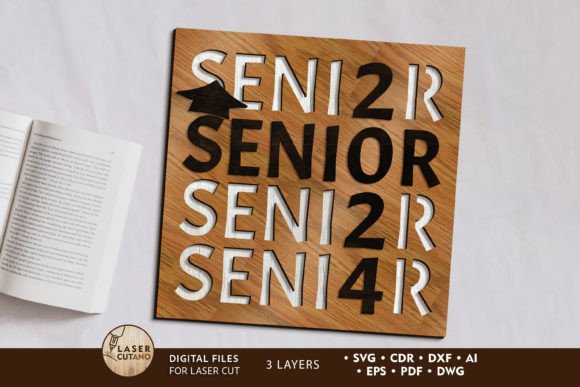
There is a distinct sense of pride in creating a physical keepsake to mark a major life milestone. Whether you are a small business owner looking to expand your seasonal catalog, a parent wanting a unique gift for your graduate, or a hobbyist eager to test your machine's capabilities, the Class 2024 Decorative Laser Cut File offers a fantastic starting point. These digital multilayer layout files are specifically engineered for laser cutters, CNC routers, and other precision cutting machines. However, possessing the file is only half the battle. Many creators rush from download to production without fully understanding the nuances of multilayer assembly, often leading to wasted material and frustration. By approaching this project with a bit of foresight and technical awareness, you can ensure your finished product looks professional and stands the test of time.
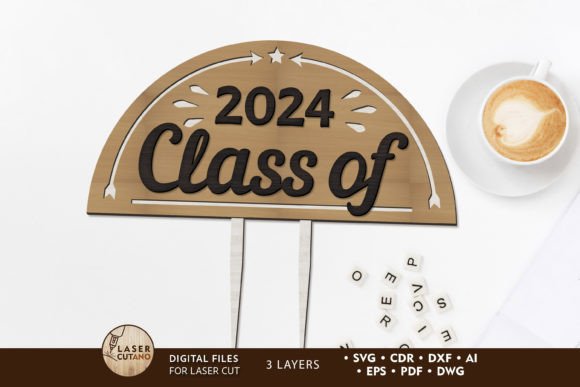
The core appeal of these graduation designs lies in their versatility. Provided in a comprehensive .zip folder containing .AI, .SVG, .DXF, .DWG, .CDR, .EPS, and .PDF formats, these files cater to virtually any software ecosystem, from Glowforge and xTool to industrial CNC setups. The standard design yields a finished product measuring 6 x 10 inches, optimized specifically for 3mm thickness materials like plywood, MDF, acrylic, or plexiglas. While the promise of a quick turnaround is tempting, skipping the preparation phase is the most common pitfall. Before you even think about powering up your laser, you must unzip the folder and inspect the vector paths. Corrupted files or incorrect scaling settings can ruin a sheet of expensive acrylic in seconds. Always verify that your software reads the layers correctly and that the dimensions match your intended output before committing to a cut.
Avoiding Material and Thickness Miscalculations
One of the most frequent errors makers encounter involves material selection and thickness assumptions. The Class 2024 Decorative Laser Cut File is meticulously calibrated for 3mm stock. If you attempt to use 4mm or 5mm material without adjusting the file, the joints will not fit, and the layered depth effect will be lost. Conversely, using material that is too thin can result in a flimsy final product that lacks the structural integrity needed for a display piece. It is crucial to measure your actual material with calipers rather than relying solely on the manufacturer's label, as "3mm" plywood can often vary by a fraction of a millimeter.
Furthermore, the choice between wood and acrylic changes how you approach the cut. Plywood and MDF offer a warm, traditional aesthetic perfect for school memorabilia, but they require careful attention to grain direction and potential charring. Acrylic and plexiglas provide a modern, sleek look but demand precise power and speed settings to avoid melting edges. If you are new to working with multilayer models, start with a scrap piece of your chosen material to test the fit. This simple step saves money and prevents the disappointment of a project that falls apart because the friction fit was too loose or too tight.
The Critical Step of Painting Before Assembly
Perhaps the most overlooked detail in multilayer projects is the timing of the finishing process. A common misconception is that you can cut, assemble, and then paint the entire unit. With intricate graduation designs featuring overlapping letters and decorative elements, this approach is practically impossible. You simply cannot reach the nooks and crannies once the layers are glued together. The golden rule here is to paint before gluing.
Take the time to sand each layer lightly after cutting to remove any smoke residue or rough edges. Apply your stain, paint, or sealant to individual pieces while they are flat. This ensures even coverage and allows you to create contrast between layers—for example, keeping the base natural wood while painting the "2024" text in school colors. Once the paint is fully cured, you can proceed to assembly. Rushing this stage often leads to smudged paint on visible surfaces or uneven color distribution that detracts from the professional quality of the piece.
Scaling Considerations and Structural Integrity
Flexibility is a key feature of these digital files; you can increase the size of the design to create a large wall hanging or a centerpiece. However, caution is required when reducing the design. Multilayer files contain fine details and connecting bridges that hold the layers together. If you shrink the file too much, these thin elements may become fragile or disappear entirely during the cutting process, causing parts of the design to fall out or break easily. Always preview the scaled design in your software and check the smallest features against your machine's minimum kerf width.
If you need a smaller version, consider simplifying the design by removing the innermost detailed layers rather than shrinking the whole vector proportionally. This maintains the structural soundness of the piece while adapting it to your size requirements. Remember, the goal is a durable keepsake that the graduate can display for years, not a fragile prototype that breaks upon handling.
Ensuring a Smooth Workflow from Download to Delivery
To maximize efficiency and satisfaction, treat the digital file as a blueprint that requires interpretation, not just execution. Check the layer organization in your vector software. Ensure that cut lines are distinct from score lines if your design includes them. For those selling these items, consistency is key. Document your settings for power, speed, and frequency for both wood and acrylic so you can replicate the high-quality results every time. For educators and students using school CNC or laser labs, double-check that the file format you upload (whether .DXF or .SVG) is compatible with the specific lab equipment to avoid runtime errors.
Ultimately, the Class 2024 Decorative Laser Cut File is a powerful tool for creativity and commerce. By respecting the material constraints, adhering to the "paint before glue" protocol, and carefully managing scale, you transform a simple digital download into a cherished physical memory. Take your time with the setup, verify your measurements, and enjoy the process of bringing this celebratory design to life. The extra attention to detail now will pay off in the form of a stunning, professional-grade graduation gift that truly honors the achievement.